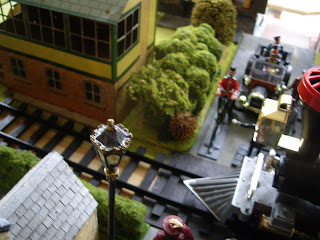
Reports have just been received that on Wednesday, October 9, at 2pm, gunfire was heard on the outskirts of the city of Strelsau, the capital of Ruritania.
During the previous night posters had appeared calling on the city residents to support Prince Michael's army in their campaign to remove Prince Rudolph's administration.
Although Prince Rudolph had made no counter statement, his military commander, Colonel Sapt {also spelt Zapt) announced a curfew would apply from 6pm to 6am. Any residents found on the streets during such hours would be severely punished.
Previously, at 1pm, a train had arrived at Strelsau railway station, and Prince Rudolph disembarked. The Prince had subsequently gone on to inspect the store of provisions in a local tavern.
Troops, loyal to this prince, had already been seen about the capital, constructing barricades at several key locations. We are further informed that soldiers had also occupied St. Etheldreda's Church, something which was not well received by the local population.
The following photographs were taken from Mr Ferdinand von Zeppelin's 'lighter than air' transportation. These photographs clearly show forces loyal to Prince Michael had entered the city suburbs.
MOVE ONE Prince Michael's troops advanced. MOVE TWO Rudolph's military band fired a cannon, scoring a hit on the Buff Regiment. MOVE THREE They fired again with a hit on Michael's artillery crew. MOVE FOUR Michael's artillery scored a revenge hit. MOVE FIVE Yes, another D6 took out a second of Rudolph's artillerymen, and the survivor ran away. MOVE SIX Michael's troops continued to advance. MOVE SEVEN, EIGHT, NINE Occasional rifle shots from and at the church, but no casualties. Many were now skirmishing, and using cover.
MOVE TEN A casualty to the Buff Regiment, but the artillery took down a White Guard. But Rudolph's Blue/White Regiment delivered a volley which halved Michael's cavalry, and they only just held on. They were obliged to subsequently retire. MOVE ELEVEN A brave charge by the Blue/White Regiment faltered under the fire from the Grey/Crimson skirmishers.MOVE TWELVE The Blue/White Regiment attempted a second charge, but a withering fire dropped them to half strength, and they routed. MOVE THIRTEEN Prince Michael personally lead the Grey/Crimson Regiment towards the now undefended railway station! I thought it appropriate to throw a dice to determine if the train would depart the station, it stayed, but staff and civilian supporters of Rudolph now fled the station. MOVE FOURTEEN The dice now favoured Michael, two more opponents went down. Unfortunately, his artillery was obliged to open up on the church, and with a D6 scored a hit. Rudolph now departed the field, escorted by Colonel Sapt and the White Guard.MOVE FIFTEEN Prince Michael took the railway station, capturing both the train and Rudolph's automobile. The two regiments still operating about the church were now facing two opposing regiments, and artillery. With no ability to take out the latter...... they wisely chose to retire! GAME OVER
The artillery piece firing on the church now gave the advantage to Michael's troops.
A very enjoyable two hours gaming, and a chance to put loads of buildings on the table. Games are always more interesting with buildings to fight over. Casualties were 14 for Rudolph, with seven more routing, Michael's totalled only six. Less than ninety soldiers were involved. For the record, battle losses from artillery totalled five. I thought Prince Rudolph was going to win on move eleven, but the small arms fire from the Grey/Crimson Regiment twice broke an enemy charge, and secured the day.
PAINTING PROJECTS (from the Exeter show)
Have been working on the new figures acquired at the Exeter Toy Fair. First up are the medieval Herald archers. The three converts (in more ways than one) have allowed me to complete a Saracen-Ottoman bow unit of twelve. Milliput having altered their principal garments.
I am very pleased with this elegant knight, just a little bit of paintwork, and a coat of varnish, it has made a fine dismounted commander. And two more archers are drafted.Next up are some 19th century additions. My Royal Marines artillerymen now have a sergeant.Combining some Victorian artillerymen with four I already had, discovered they actually represented two distinct corps. By mix and match, and some repainting, the nine figures have furnished a Royal Artillery garrison crew for my siege mortar.While the remaining figures now represent the Royal Horse Artillery, in stable jackets and pillbox hats.Obviously, artillery figures will be used as required, but I like linking my crews to actual guns in my armies. It makes the collection seem more complete.Here are some more figures recently acquired from Exeter. These two have been given a tidying up. The ACW artillery officer will be useful in several period conflicts.
These old Crescent Arabs have been given a full paint job.This W. Britains lead Zouave has been paint stripped, repaired and repainted.Converted another spare Timpo confederate into a mid 19th century naval figure, this gives me two gun crews of four.


